Home › Forums › G Suite Admin Console › Easily manage Google Groups
Tagged: Email Lists, G Suite Admin, Google Groups, Rob Clarke, Steve Matthews
- This topic has 6 replies, 2 voices, and was last updated 6 years, 9 months ago by
 Rob Clarke.
-
AuthorPosts
-
-
October 31, 2017 at 12:15 pm #3769
 Rob ClarkeKeymaster
Hi everyone,
 Some of you may wonder ‘how do I find out which staff are in which group?’ inside your G Suite system.
This video is from part of a meeting with John the principal of Everglade School. It shows you how to easily manage your Google Groups from inside the Admin Console. John works with Anna, Raewyn and Hansa who are also members 😉
This video is 18 minutes long, if you click here and open it in Youtube, you’ll see in the description that there are chapter markers, which you can click on to fast forward to different parts of the movie.
Enjoy…
In order to be able to do this, you’ll need to have some level of administrator access – reply to this topic if you’d like help getting this sorted so you can manage these groups yourself.
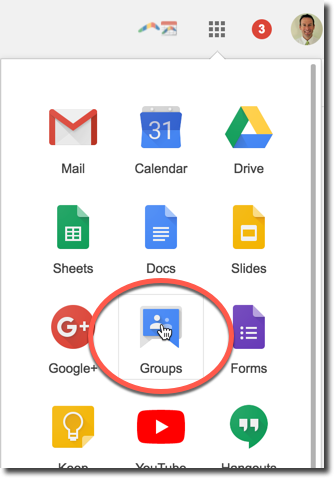
If you don’t have access to the Admin Console, don’t worry, you can access your groups and then go into them to see who the members are – see this screenshot.
Using this method you can only see the groups you’ve been given access to.
-
February 9, 2018 at 12:04 pm #4542
Hi Rob,
I have loaded groups into the admin console Yr 1 to Yr 8. How do I access those in gmail?
Steve
-
February 9, 2018 at 2:14 pm #4543
 Rob ClarkeKeymaster
Hi Steve,
In looking at your admin console, I can see what you’ve done. I thought you wanted to create group email lists for each class in the school?
Follow these steps (I’m assuming that is what you want here):
- Create a group for Room 3 – name it Room 3 Parents
- Give it an email that isn’t abbreviated. The reason I suggest this is that other staff may need to use it, this is important as you want others to be able to use it easily.
- Make it ‘announcement’ only – this ensures it is an email distribution list, not a discussion channel.
- Don’t add all users at tasmanbaychristian.school.nz – this is just for Room 3 parents in this case.
- Add each parent email in as a member.
- Add each staff member in as an owner.
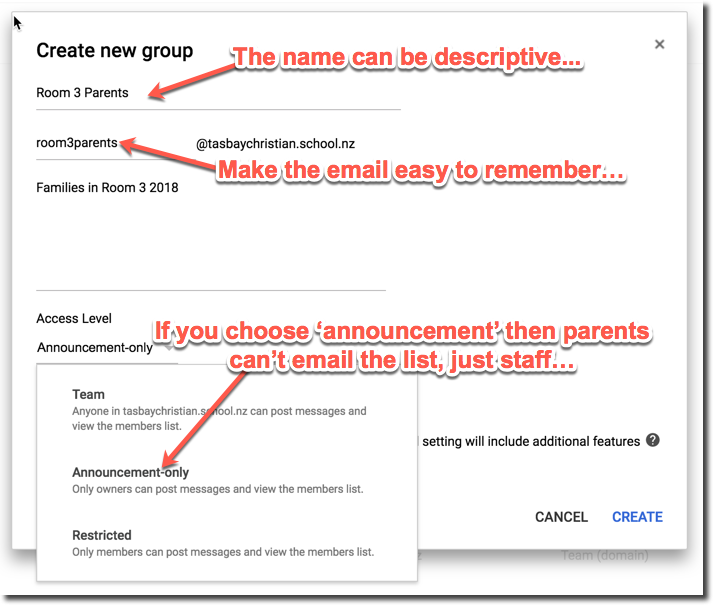
I suggest you create one group, then ping me back here and I’ll check for you 😉
Rob
-
This reply was modified 8 years ago by
 Rob Clarke. Reason: More info
-
February 13, 2018 at 4:25 pm #4550
Hi Rob,
I loaded through the admin console new groups for year levels. When I go to g-mail they do not appear?
I watched the video you sent but it didn’t cover these aspects.Steve
-
February 13, 2018 at 4:48 pm #4553
 Rob ClarkeKeymaster
Hi Steve,
Oh yes, sorry I didn’t go over that part in the last email. Here are the instructions:
- Log into the Admin Console > Groups
- Put each staff member into the group as an ‘owner’.
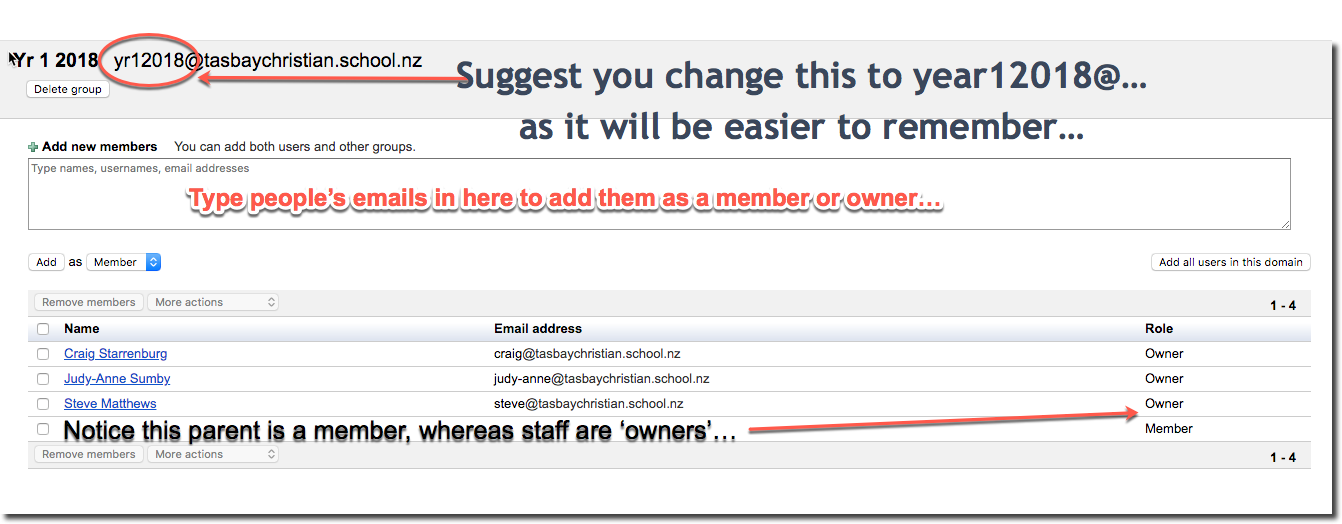
- Then click on the name of the group again to go back a step, so you can see the options for the group again and click on Roles and Permissions.

- From there, select ‘Announcement Only’ which means only group owners can email the group.
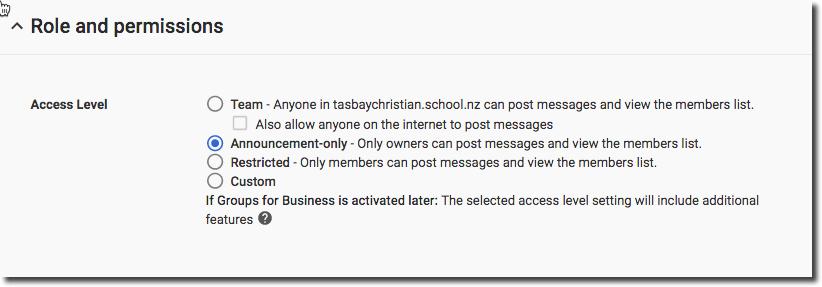
You ‘may’ have to type the email address for the first time as the directory refreshes… let me know how you go. There is another version of Groups which is called Groups for Business that can be activated which has many more features/settings (and complexity) which can be activated – I’d suggest this if what we currently have doesn’t quite match your needs.
Rob
-
This reply was modified 8 years ago by
 Rob Clarke. Reason: Added additional screenshots to make it more obvious
-
February 26, 2018 at 9:24 pm #4592
 Rob ClarkeKeymaster
Hi @stevetasbaychristian-school-nz,
Good to meet with you earlier today. As promised, here is the email list for printing and giving out to staff:
Tasman Bay Christian Group List
I suggest you print these out and get staff to stick them into diaries, or attach next to their desks where they work to serve as a prompt for learning the groups.
Rob
-
May 9, 2019 at 3:02 pm #5821
 Rob ClarkeKeymaster
To add an outside user (eg. a parent) follow these steps:
- Go to admin.google.com
- Navigate to Groups and locate the group in question.
- Bottom left, click the link for Membership Settings.
- The settings panel will open up, scroll to the very bottom, then locate and click on Advanced Settings (at the bottom in the middle). From there, a new tab/window will open up with additional settings for the group.
- Click Members > Direct add members
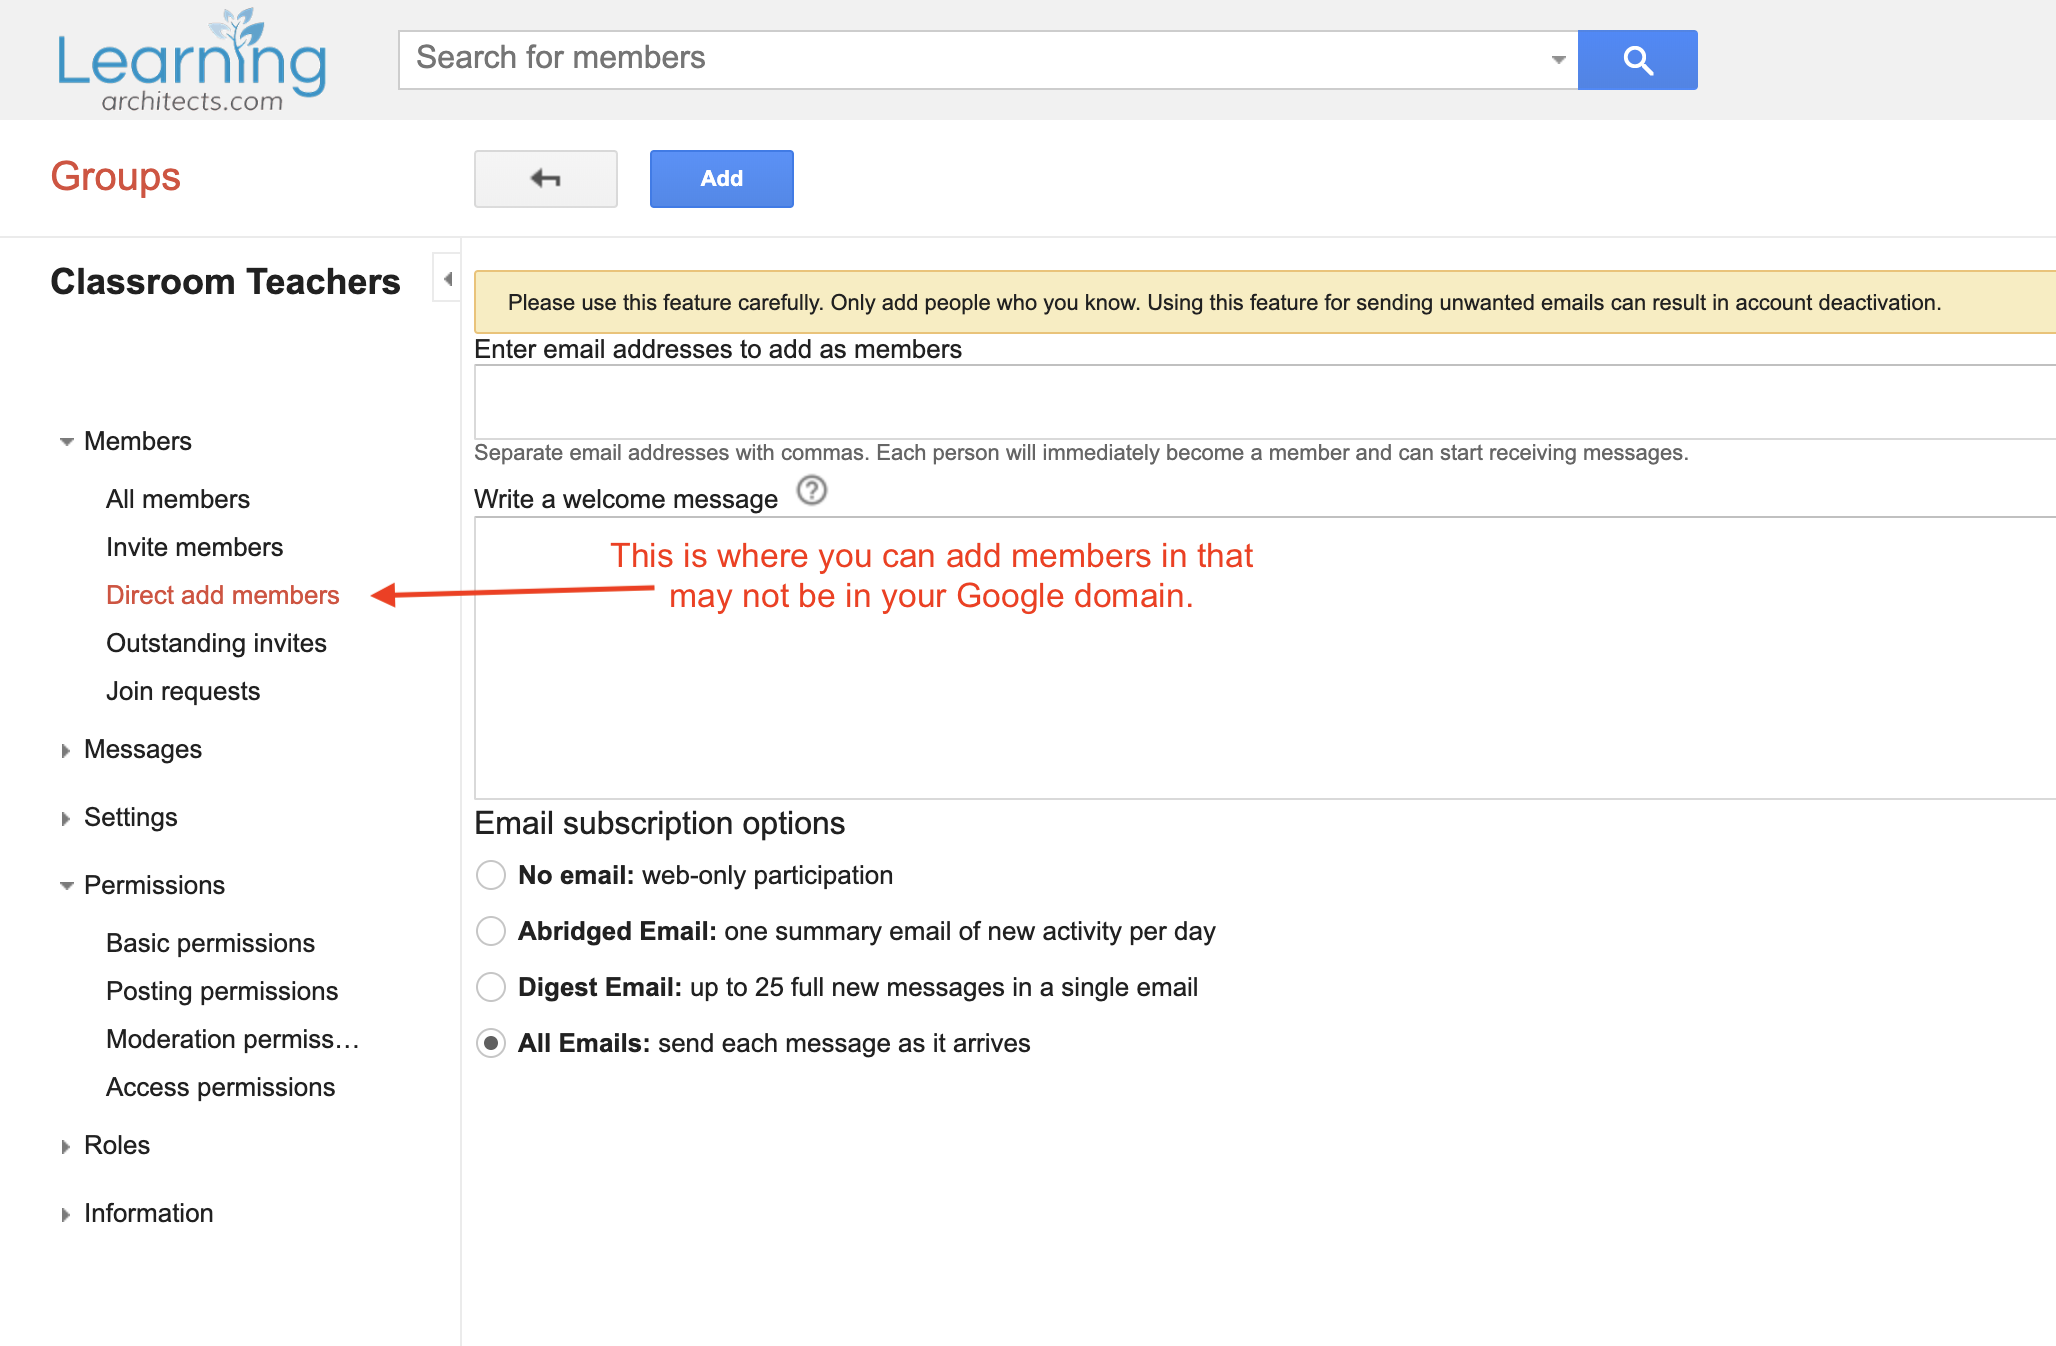 Once you’ve found this section, you can add email addresses (up to 25 at a time) to the email group.
-
-
AuthorPosts
- You must be logged in to reply to this topic.
